Table of Contents
Pop Tarts have been a breakfast staple and snack-time treat for decades. With their flaky pastry, sweet filling, and colorful glaze, they bring a sense of nostalgia to anyone who grew up enjoying them. But why settle for store-bought Pop Tarts when you can make your own at home? Homemade Pop Tarts not only taste fresher and more delicious, but they also allow you to customize the flavors, fillings, and decorations to suit your preferences.
This guide will walk you through everything you need to know about making homemade Pop Tarts, from preparing the dough to glazing the final product. Along the way, you’ll discover tips for achieving the perfect pastry, creative flavor combinations, and ways to make your Pop Tarts extra special. And if you enjoy making treats like this, you might love exploring Brookie Recipes or trying your hand at Strawberries and Cream Cruffins for more delightful baked goods.
What Are Pop Tarts?
Origin and History of Pop Tarts
Pop Tarts were introduced by Kellogg’s in 1964 as a convenient, ready-to-eat toaster pastry. Initially created to compete with Post’s similar product, they quickly gained popularity for their sweet fillings and versatility. Over the years, Pop Tarts have become a beloved part of American culture, with flavors ranging from the classic Strawberry to indulgent S’mores.
Store-Bought vs. Homemade Pop Tarts
While store-bought Pop Tarts are convenient, homemade versions offer several advantages:
- Better Ingredients: You control what goes into your Pop Tarts, avoiding artificial flavors and preservatives.
- Custom Flavors: Experiment with fillings and glazes beyond the usual options.
- Superior Taste: Homemade pastry is flakier and more buttery than prepackaged versions.
Ingredients for Homemade Pop Tarts
Essential Ingredients for the Pastry
- All-Purpose Flour: The foundation of the pastry dough.
- Unsalted Butter: Cold and cubed for a flaky texture.
- Granulated Sugar: Adds a hint of sweetness to the crust.
- Salt: Balances the flavors.
- Ice Water: Helps bind the dough without making it sticky.
Filling Options
Classic Fillings:
- Strawberry Jam: The quintessential Pop Tart flavor.
- Brown Sugar and Cinnamon: A comforting, warm option.
Creative Fillings:
- Nutella or Chocolate Ganache: For a rich, indulgent treat.
- Lemon Curd: Bright and tangy.
- Peanut Butter and Jelly: A nostalgic twist on a classic sandwich.
Glaze Ingredients and Decorations
- Powdered Sugar: The base for the glaze.
- Milk: To achieve the right glaze consistency.
- Vanilla Extract: Adds depth of flavor.
- Food Coloring and Sprinkles: For a fun and colorful finish.
Tools You’ll Need
- Rolling Pin: To flatten the dough evenly.
- Baking Sheet: For baking the Pop Tarts.
- Pastry Brush: For sealing the edges with egg wash.
- Fork: For crimping the edges and adding a classic design.
- Mixing Bowls: For preparing the dough and glaze.
- Sharp Knife or Pastry Cutter: To cut the dough into rectangles.
How to Make Homemade Pop Tarts
Making Pop Tarts from scratch is a fun and rewarding process. Follow these step-by-step instructions to create perfect, flaky, and delicious pastries.
Step 1: Preparing the Dough
- Combine Dry Ingredients: In a mixing bowl, whisk together 2 ½ cups of all-purpose flour, 1 tablespoon of sugar, and ½ teaspoon of salt.
- Cut in the Butter: Add 1 cup of cold, cubed unsalted butter. Use a pastry cutter or your fingers to work the butter into the flour until the mixture resembles coarse crumbs.
- Add Ice Water: Gradually stir in 4–6 tablespoons of ice water, one tablespoon at a time, until the dough comes together. Avoid overmixing to keep the pastry flaky.
- Chill the Dough: Divide the dough into two discs, wrap them in plastic wrap, and refrigerate for at least 30 minutes.
Step 2: Making the Filling
- Prepare the Classic Fillings:
- For Strawberry: Use your favorite store-bought or homemade strawberry jam.
- For Brown Sugar Cinnamon: Mix ½ cup of brown sugar, 1 teaspoon of ground cinnamon, and 1 tablespoon of flour.
- Experiment with Creative Fillings: Try Nutella, lemon curd, or your favorite fruit compote for a unique twist.
Step 3: Assembling the Pop Tarts

- Roll Out the Dough: On a lightly floured surface, roll one disc of dough into a large rectangle, about ⅛ inch thick.
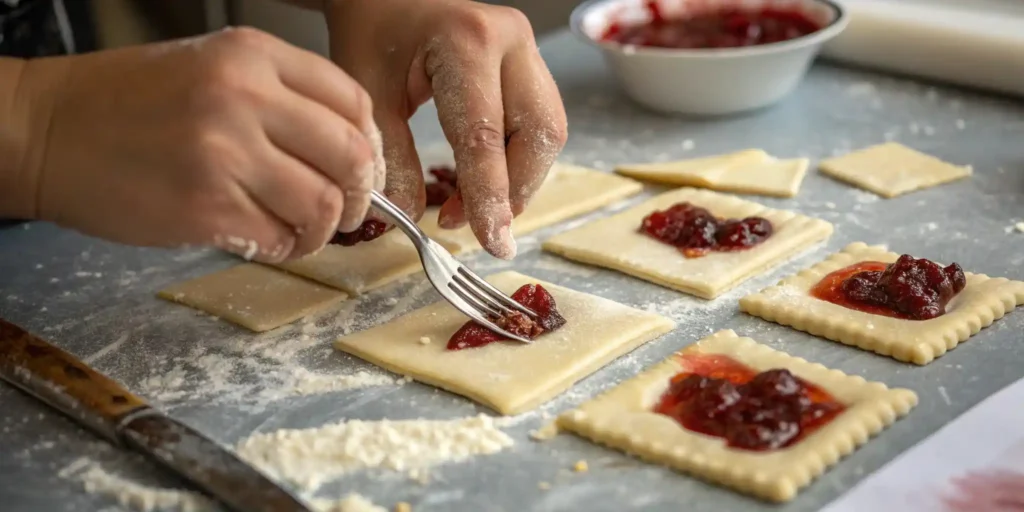
- Cut the Dough: Use a sharp knife or pastry cutter to cut the dough into evenly sized rectangles (about 3×4 inches). Repeat with the second disc of dough.
- Add the Filling: Spoon 1–2 tablespoons of your chosen filling onto half of the rectangles, leaving a small border around the edges.
- Seal the Edges: Brush the edges with egg wash (1 beaten egg + 1 tablespoon water). Place another rectangle on top and press down gently to seal.
- Crimp with a Fork: Use a fork to crimp the edges for a classic Pop Tart look.
Step 4: Baking the Pop Tarts
- Preheat the Oven: Set your oven to 375°F (190°C).
- Bake: Place the Pop Tarts on a lined baking sheet and bake for 20–25 minutes, or until they are golden brown. Let them cool completely before glazing.
Step 5: Adding the Glaze and Decorations
- Make the Glaze: In a bowl, mix 1 cup of powdered sugar with 2–3 tablespoons of milk and ½ teaspoon of vanilla extract until smooth. Add food coloring if desired.
- Decorate: Spread the glaze over the cooled Pop Tarts and sprinkle with colorful decorations or crushed nuts. Let the glaze set before serving.
For more creative baking ideas, you might enjoy trying our Million Dollar Chicken Casserole Recipe or learning about Brookie Recipes for a hybrid dessert.
Tips for the Perfect Pop Tart
Ensuring Flaky Pastry Dough
- Use cold butter and handle the dough as little as possible to maintain its flakiness.
- Chill the assembled Pop Tarts for 10 minutes before baking to help the layers puff up.
Choosing the Right Filling Consistency
- Avoid runny fillings, which can leak during baking. Cook down fruit fillings to a thicker consistency.
- Leave enough space around the edges to prevent overflow.
Common Mistakes to Avoid
Underfilling: Use enough filling to make each bite flavorful, but not so much that it bursts.
Overbaking: Watch closely to avoid overly browned or dried-out pastries.
Variations of Pop Tarts
One of the best things about homemade Pop Tarts is how versatile they are. You can adapt the recipe for different flavors, dietary needs, and occasions. Here are some creative variations to try:
Creative Fillings
- Fruity Bliss: Experiment with seasonal fruits like peach, raspberry, or apple compote for a fresh twist.
- Chocolate Lover’s Dream: Use Nutella, chocolate ganache, or peanut butter for a rich, indulgent filling.
- Savory Pop Tarts: Fill with spinach and feta, ham and cheese, or scrambled eggs for a breakfast-inspired option.
Seasonal or Holiday-Themed Pop Tarts
- Pumpkin Spice: Fill with spiced pumpkin puree and top with a cinnamon glaze for a fall treat.
- Peppermint Chocolate: Pair chocolate filling with a crushed candy cane glaze for the holidays.
- Red, White, and Blue: Use strawberry, blueberry, and vanilla glaze for a patriotic summer dessert.
Making Pop Tarts Vegan or Gluten-Free
- Vegan Option: Use vegan butter and plant-based milk for the pastry and glaze. Replace egg wash with a non-dairy milk wash.
- Gluten-Free Option: Substitute all-purpose flour with a gluten-free baking mix that works well for pastries.
For more sweet inspiration, try our guide on making Chocolate Craving Cake or explore the rich, buttery goodness of Brown Butter Chocolate Chip Cookies.
Serving Suggestions

Pop Tarts are versatile and can be enjoyed in many ways. Here’s how to elevate your homemade pastries:
How to Serve Homemade Pop Tarts
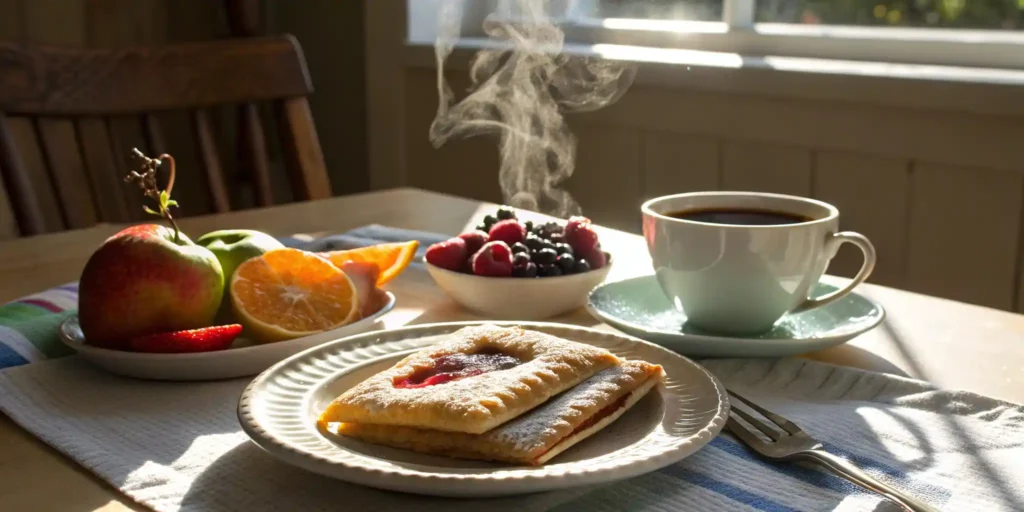
- Breakfast Treat: Serve warm with a side of scrambled eggs or yogurt for a balanced breakfast.
- Dessert Delight: Pair with a scoop of ice cream or a dollop of whipped cream for an indulgent dessert.
- On-the-Go Snack: Wrap in parchment paper for a convenient, portable snack.
Pairing Ideas
- Beverages: Enjoy with coffee, hot cocoa, or a glass of milk.
- Side Dishes: Complement with fresh fruit or a small salad for a light, refreshing addition.
Nutritional Information
Calorie Breakdown and Nutritional Value
The calorie count for homemade Pop Tarts depends on the ingredients and filling. On average, one homemade Pop Tart contains:
- Calories: ~300–350
- Fat: ~15–18g
- Carbohydrates: ~35–40g
- Protein: ~4–6g
Tips for Enjoying in Moderation
- Opt for smaller portions or mini Pop Tarts to satisfy your craving without overindulging.
- Pair with a protein-rich breakfast to create a more balanced meal.
Frequently Asked Questions (FAQs)
Can I Freeze Homemade Pop Tarts?
Yes! After baking and cooling, store them in an airtight container or freezer bag. Freeze for up to 3 months. Reheat in the toaster or oven for best results.
What’s the Best Way to Reheat Them?
Reheat in a 350°F (175°C) oven for 5–8 minutes to maintain crispness. Avoid microwaving as it may make the pastry soggy.
Can I Use Premade Pie Crust?
Absolutely! Premade pie crust is a convenient alternative to homemade dough. It won’t be as flaky, but it still works well.
How Do I Prevent the Filling from Leaking?
- Avoid overfilling the Pop Tarts.
- Seal the edges securely with egg wash and crimp tightly with a fork.
- Chill the assembled Pop Tarts before baking.
How Long Do Homemade Pop Tarts Last?
Store Pop Tarts in an airtight container at room temperature for up to 3 days or in the refrigerator for up to 5 days.
Conclusion
Homemade Pop Tarts are a delicious and nostalgic treat that you can customize to your heart’s content. From classic strawberry to decadent chocolate, these pastries are perfect for breakfast, dessert, or a snack. By following this guide, you’ll be able to enjoy flaky, flavorful Pop Tarts that are far superior to their store-bought counterparts.
Why not try making your own batch today? And if you’re looking for more baking inspiration, explore our recipes for Million Dollar Chicken Casserole or learn about Hawaiian Sandwiches for another delicious option.